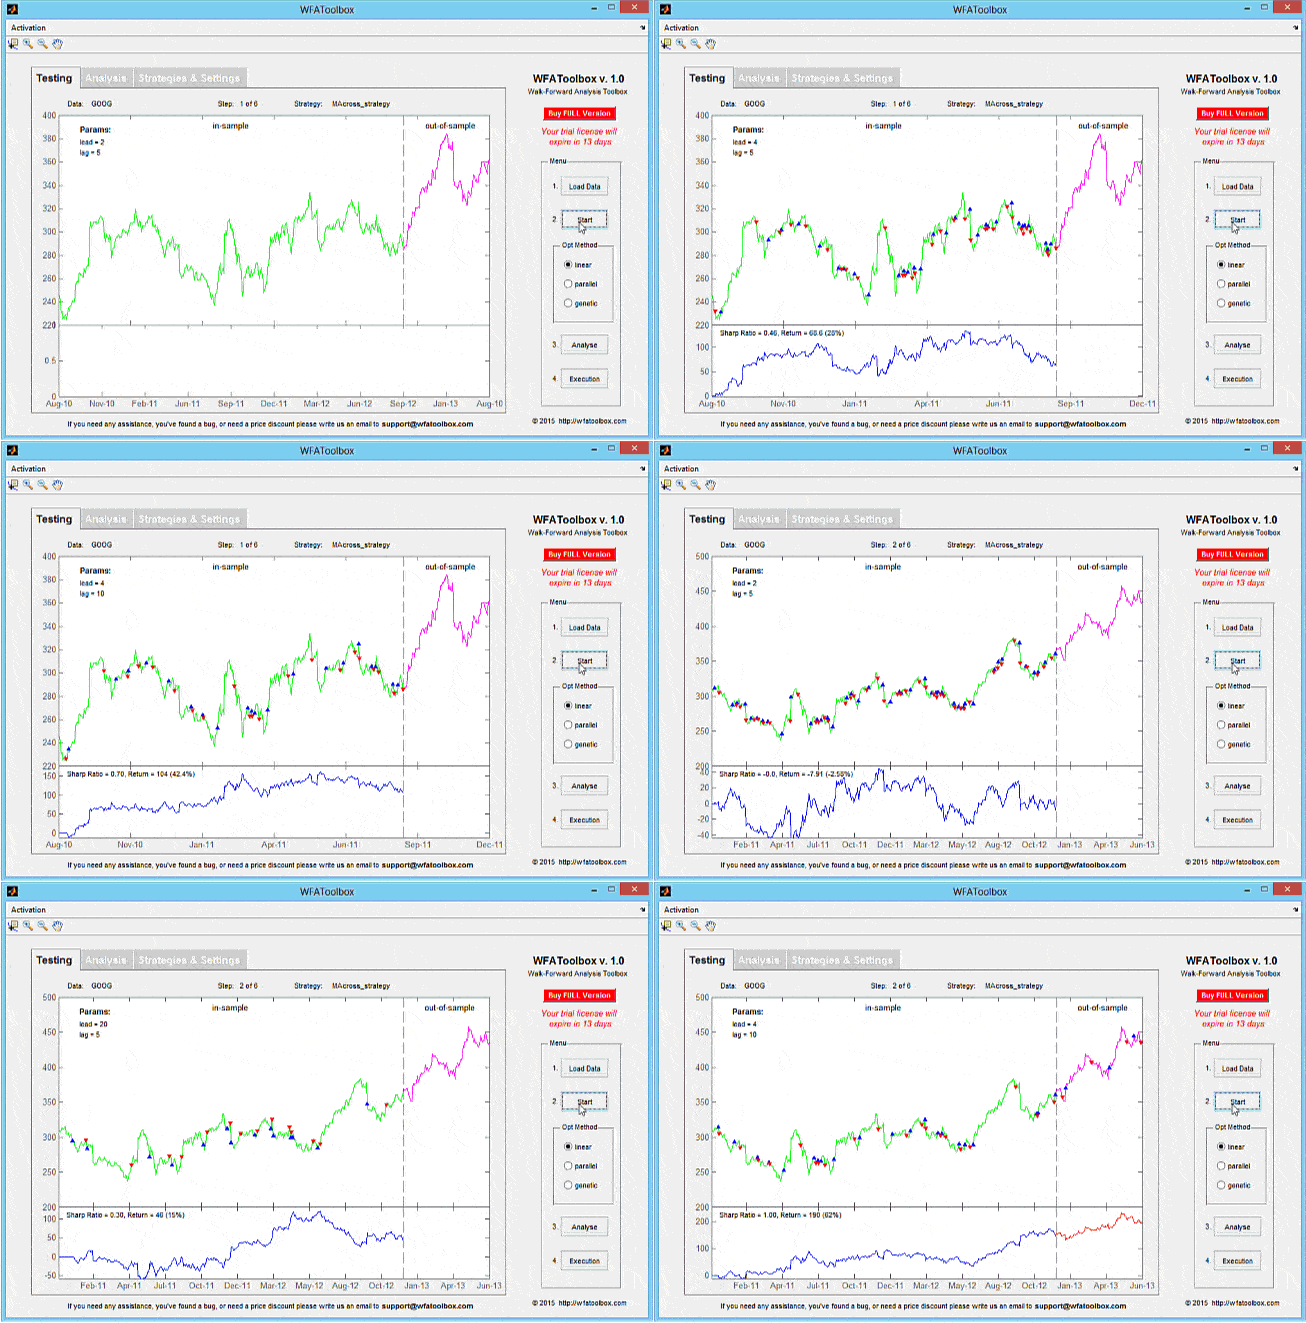
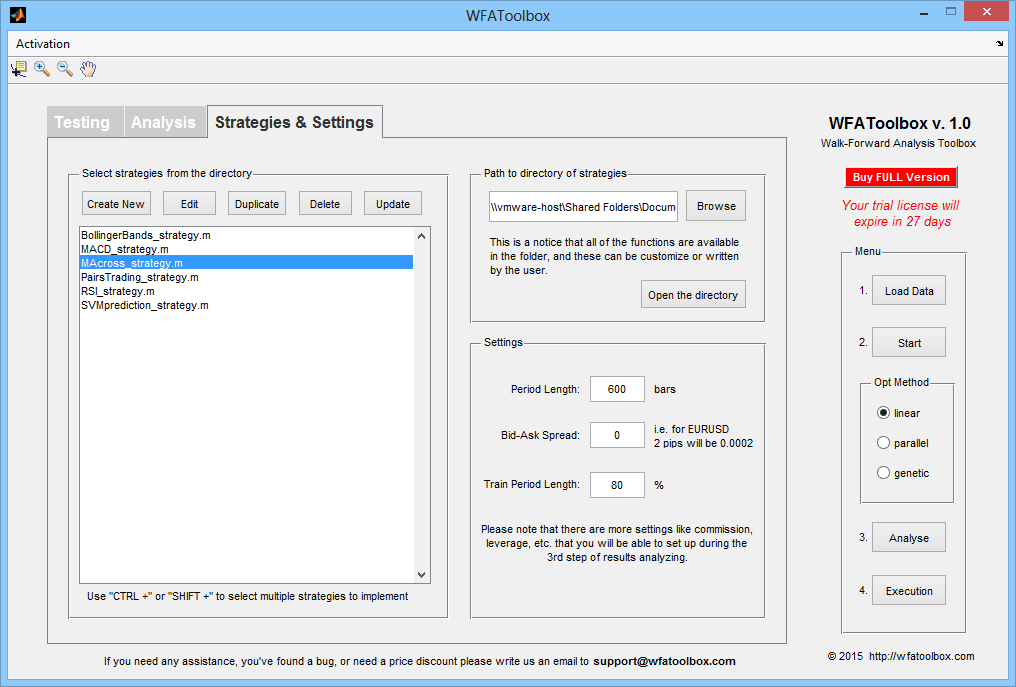
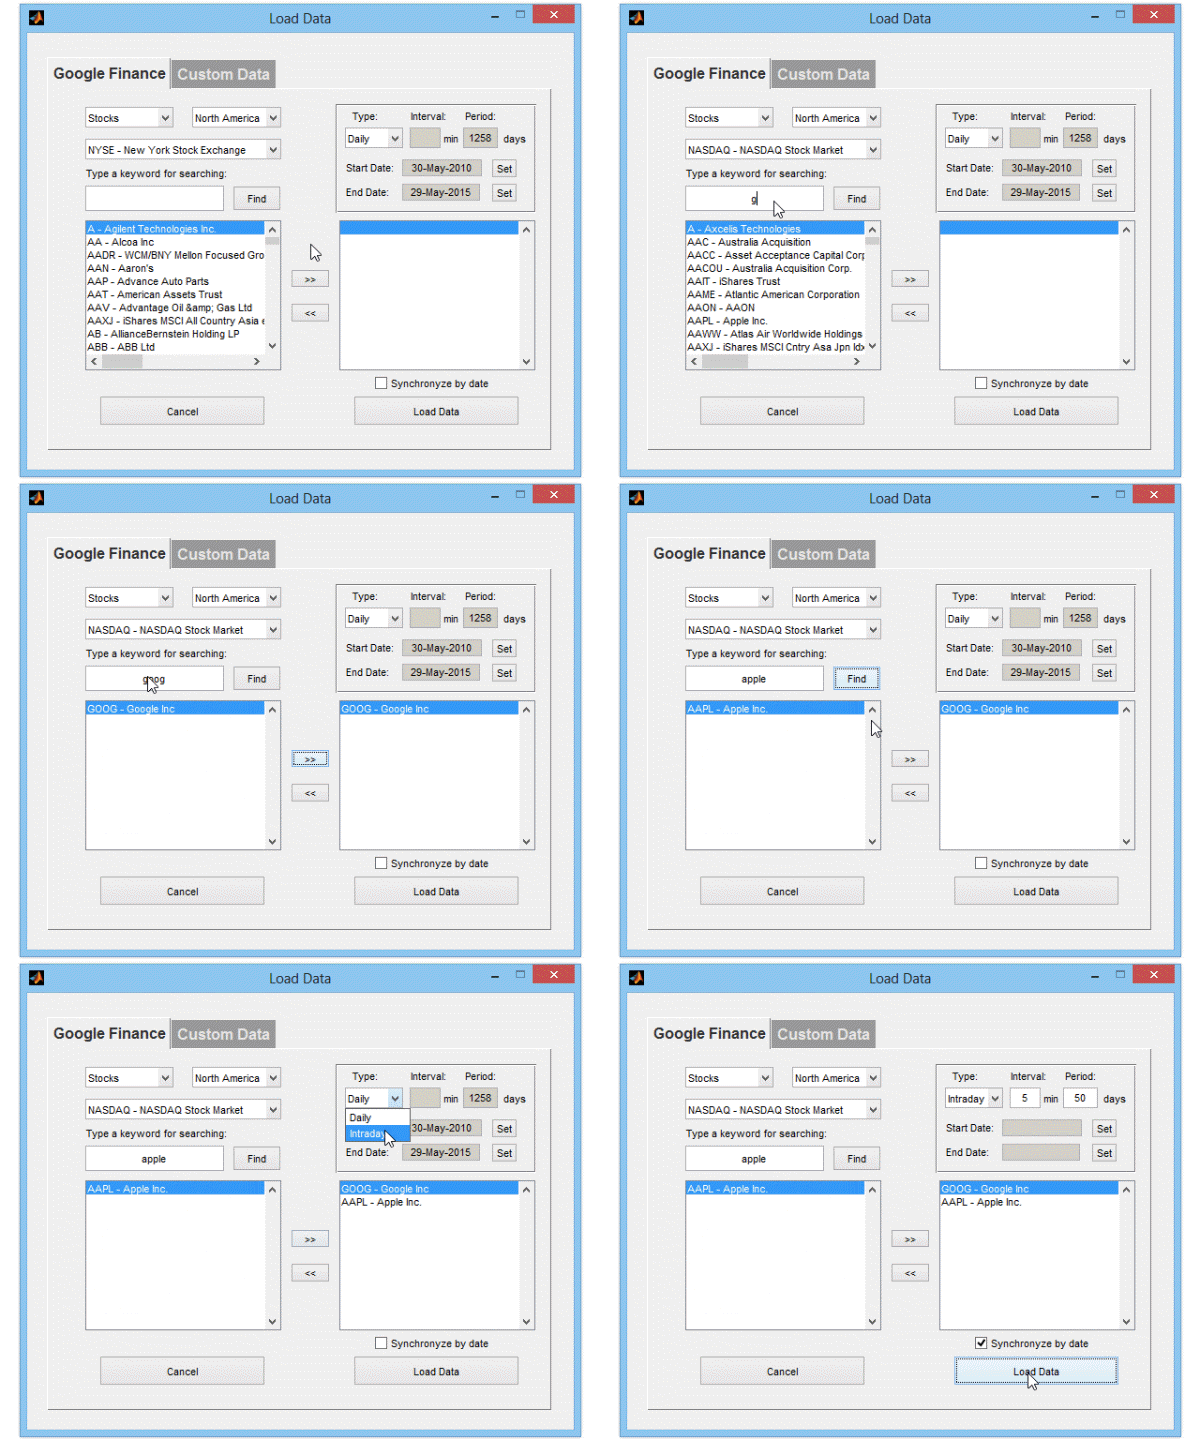
I’d like to introduce guest blogger Alex Boykov, one of the developers of the Walk-Forward Analysis Toolbox for Matlab (WFAToolbox), which enables accelerated trading strategies development using Matlab. Today, Alex will explain how they used tabs in a way that can be replicated by any other Matlab GUI, not necessarily having the latest Matlab release.
In this post, we want to tell you about how we solved the problem of tab creation for WFAToolbox. We required the following criteria:
- The tabs need to be attractive and look like tabs, not like buttons with panels
- The tabs need to have been drawn using the editor GUIDE so that the contents of the tab panel can be easily edited
- The tabs can be easily added and removed without significant code additions. They must be simple to use in different projects and tasks
The sophisticated user of Matlab might think that this is a trivial objective, seeing as there are numerous solutions for this problem in the Matlab Exchange and since Matlab R2014b, it supports creating native tabs with the help of uitab and uitabgroup functions. Also, with the addition of App Designer, it might appear that this issue will be solved with the new interface for GUI creation; tabs can be created right in the editor. However, in this post, we will attempt to explain why none of the methods above fit the three criteria stated and we will present our own solution for the tabs.
Regardless of the fact that we only took on the problem in 2013, when we first started creating our WFAToolbox, at the moment of writing this article (January 2016), this problem is still a relevant issue for many Matlab users. After the release of R2016a, it is doubtful the problem will be entirely solved. This is why we created our own example of a code which we have released on the Matlab File Exchange (see below).

Tab-enabled WFAToolbox (Matlab app for algorithmic trading)
1. The tabs have to look like tabs
When we created WFAToolbox, our goal was to create an application which would allow everyone interested to create a strategy for trading on the financial markets to be able to do so, along with having the opportunity to use the full potential of Matlab and its progressive tools, including genetic algorithms, parallel computing, econometrics, neural networks, and much, much more (basically, any data analysis that can be done in Matlab). At the same time, we do not want our users to spend time on developing an advanced software environment for testing, analysis, and strategy execution, but rather to do it from an easy-to use GUI. Thus, in WFAToolbox, you can create, test, and, finally, launch your own trading strategy or test a hypothesis within minutes, even with little prior knowledge of Matlab programming.
Of course, in order to fit these features into a single application, guarantee that it would be easy to understand even by beginners, and that it would be simple to operate, it was necessary to pay special attention to the graphic interface. In our opinion, perhaps the most intelligent solution for placing the many controls and functions necessary for sophisticated applications is by creating tabs. Because we knew that we were not the only ones who thought this way, we started looking for examples of codes that were previously created in the Matlab Exchange. We were very surprised when we found only a few solutions, most of which did not even match our first criteria of tab attractiveness! Unfortunately, a majority of them were old and quite unattractive (they looked more like buttons with panels). Even the new App Designer has tabs that in our eyes look more like buttons than tabs.
Having tried a lot of these utilities in our test versions, we came to the conclusion that Tab Panel Constructor v.2.8 would be the best option for us. It fits all three criteria above. In 2013, we used it quite successfully in our first versions of WFAToolbox. Everything looked great, but, unfortunately, it later turned out that the problem was far from being solved.

Tab-enabled WFAToolbox (Matlab app for algorithmic trading)
2. The tabs need to be created through GUIDE
Unfortunately, with time, it turned out that with the newer version of Matlab it didn’t work smoothly and the code we wanted to use as our solution practically fell apart in front of us. After adding a couple of elements in GUI, partial formatting was lost and we had to redo everything. The process of adding the tags created a lot of bugs which needed to be solved immediately.
In 2014, we already had more than 500 clients using our application. We started hearing, more and more often, that it would be great if the colors and locations of the tabs could be changed. It turned out that, depending on the operating system and Matlab version, the tab format changes. So, we made the decision to change our tabs.
By that time, a new version of Matlab was released, R2014b. It allowed us to build tabs with the help of the uitabgroup and uitab functions. The results looked exactly how we wanted: attractive, pleasant, and appeared like real tabs: UI With Tab Panel in Matlab R2014b. However, we were discouraged that they could not be created in GUIDE!
During that time, we were developing a module for WFAToolbox which would allow users to download data from Google Finance: 10,000+ free daily and intraday quotes from 20+ exchanges. Tabs were the easiest to use when switching between downloading free data from Google Finance and downloading custom user data from the Matlab Workspace. But entering so many elements through code and not through an editor? What will happen when we add 100,000+ free historical data from Yahoo Finance for futures, bonds, currency, stocks and others? We didn’t want to create all of this without the GUIDE editor! This is why we came to the conclusion that it is necessary for us to create a code of tabs, starting from scratch, so that they would correspond with all three of our criteria.

Tab-enabled WFAToolbox (Matlab app for algorithmic trading)
3. The tabs should be easy to add and edit
We chose the Simple Tab Panel, which has existed in the Matlab File Exchange since 2007, as a base for our new code because we considered it to be the most elegant and attractive example of GUIDE tabs. This solution fit our first two criteria, but we really wanted it to be universal and easy to use. We also wanted to have a simplified process of tab addition and deletion so that instead of having to copy and rewrite a large amount of code and other details, we could just add a single line of code. We wanted to save on labor costs, because we often add new features to WFAToolbox and this includes having to constantly add new elements to existing tabs, as well as adding new tabs.
So, we rewrote the code and created our own universal example so that everyone could use it to their advantage. We uploaded the code to the Matlab File Exchange, where it can be freely downloaded: Simple Optimized GUI Tab.
Next, we will describe how to use this code for tab addition and how to use the process for the implementation of tasks.
So, in order to add a new tab, you need to:
- Open GUIDE and apply uipanel and uitext in a way that will make uipanel easier to work with in the future, and place uitext in a place where the tab switch will be located.
- Rename the Tag of the uitext to [‘tab’,N,’text’], where N is the tab index. In our example, we are creating the 3rd tab, so our tag would be ‘tab3text’. Using this same principle, [‘tab’,N,’Panel’] needs to be renamed to tag of uipanel in the ‘tab3Panel’.
- Add the name of the new tab to the
TabNamesvariable. In our example, we use ‘Tab3’ (but you can use any name).
TabNames = {'Tab 1','Tab 2','Tab3'}; |
How the code was created
The primary principle of how our code works is that we create the uipanel and uitext objects in GUIDE, then we take the uitext coordinates and replace the objects to the axes and text objects. We assign a callback function to them which works when the object is clicked on. The function makes the uipanels visible/invisible and changes the colors of tab.
Let’s look at the function code SimpleOptimizedTabs2.m, which is part of the Simple Optimized GUI Tab submission.
1. Tab settings
% Settings TabFontSize = 10; TabNames = {'Tab 1','Tab 2'}; FigWidth = 0.265; |
If we change the parameters under Settings, we can control the appearance of our GUI and tabs. So, the parameter of TabFontSize changes the font size on the tab switch, and, with the help of TabNames we can rename or add tab names, and with FigWidth, we can determine the normalized width of the GUI.
2. Changing the figure width
% Figure resize set(handles.SimpleOptimizedTab,'Units','normalized') pos = get(handles. SimpleOptimizedTab, 'Position'); set(handles. SimpleOptimizedTab, 'Position', [pos(1) pos(2) FigWidth pos(4)]) |
The GUI width changes in the code because it isn’t comfortable to manually stretch and narrow the figure. It is more beneficial to see the contents of all tabs and work with them without having to change the width every time you make a small change. If you want to make your uipanels bigger than in the example, then do this with the GUIDE editor. However, don’t forget to change the FigWidth parameter.
Please note that, due to the peculiarities of the editor, you cannot narrow a figure by height without shifting tab locations. You can only do this if you are changing the width, so we only recommend adding tabs by increasing the width of the figure and not the length.
3. Creating tabs
Do the following for each tab: obtain the uitext coordinates, which we entered into the GUI panel, and position the axes and text using these coordinates (using the necessary settings of external apparel). Using the ButtonDownFcn parameter, we can link the callback function, called ClickOnTab, in order to switch tabs when clicking on the text or axes.
% Tabs Execution handles = TabsFun(handles,TabFontSize,TabNames); % --- TabsFun creates axes and text objects for tabs function handles = TabsFun(handles,TabFontSize,TabNames) % Set the colors indicating a selected/unselected tab handles.selectedTabColor=get(handles.tab1Panel,'BackgroundColor'); handles.unselectedTabColor=handles.selectedTabColor-0.1; % Create Tabs TabsNumber = length(TabNames); handles.TabsNumber = TabsNumber; TabColor = handles.selectedTabColor; for i = 1:TabsNumber n = num2str(i); % Get text objects position set(handles.(['tab',n,'text']),'Units','normalized') pos=get(handles.(['tab',n,'text']),'Position'); % Create axes with callback function handles.(['a',n]) = axes('Units','normalized',... 'Box','on',... 'XTick',[],... 'YTick',[],... 'Color',TabColor,... 'Position',[pos(1) pos(2) pos(3) pos(4)+0.01],... 'Tag',n,... 'ButtonDownFcn',[mfilename,'(''ClickOnTab'',gcbo,[],guidata(gcbo))']); % Create text with callback function handles.(['t',n]) = text('String',TabNames{i},... 'Units','normalized',... 'Position',[pos(3),pos(2)/2+pos(4)],... 'HorizontalAlignment','left',... 'VerticalAlignment','middle',... 'Margin',0.001,... 'FontSize',TabFontSize,... 'Backgroundcolor',TabColor,... 'Tag',n,... 'ButtonDownFcn',[mfilename,'(''ClickOnTab'',gcbo,[],guidata(gcbo))']); TabColor = handles.unselectedTabColor; end % Manage panels (place them in the correct position and manage visibilities) set(handles.tab1Panel,'Units','normalized') pan1pos=get(handles.tab1Panel,'Position'); set(handles.tab1text,'Visible','off') for i = 2:TabsNumber n = num2str(i); set(handles.(['tab',n,'Panel']),'Units','normalized') set(handles.(['tab',n,'Panel']),'Position',pan1pos) set(handles.(['tab',n,'Panel']),'Visible','off') set(handles.(['tab',n,'text']),'Visible','off') end |
Actually, if you have long tab names and you want to change the switch size, then it you may possibly need to correct the Position parameter for the text object by adding the correcting coefficients to it. Unfortunately, this is also a feature of GUIDE. If someone can solve this problem so that the text would always be shown in the middle of the switch tab regardless of the width, we would be happy to read any suggestions in the comments to this post.
4. The callback function ClickOnTab
The callback function ClickOnTab is used every time when clicking on the tab switch and the result of the switches are visible/invisible in the uipanels and in changes to the colors of the switches.
% --- Callback function for clicking on tab function ClickOnTab(hObject,~,handles) m = str2double(get(hObject,'Tag')); for i = 1:handles.TabsNumber; n = num2str(i); if i == m set(handles.(['a',n]),'Color',handles.selectedTabColor) set(handles.(['t',n]),'BackgroundColor',handles.selectedTabColor) set(handles.(['tab',n,'Panel']),'Visible','on') else set(handles.(['a',n]),'Color',handles.unselectedTabColor) set(handles.(['t',n]),'BackgroundColor',handles.unselectedTabColor) set(handles.(['tab',n,'Panel']),'Visible','off') end end |
More information about our Walk-Forward Analysis Toolbox for Algorithmic Trading (WFAToolbox) can be found at wfatoolbox.com.


I was joyed to discover tabs finally arrived, but my joy was short lived upon discovering that GUIDE couldn’t create tabs. Last year, a client requested to add a tab to an existing GUI made in GUIDE and I didn’t want to programme the GUI layout. With some simple tweaks I could fuse of two independent GUIs made in GUIDE into two tabs of a single GUI using uitab. It worked well. Downside is that this method becomes tedious if the components in either tabs need changes.
p.s. I don’t know if this is a known method. Publishing it on my blog has been on my to do list for a while; if it’s not a known method, I will post a link here when I blog it.
I just copy the contents of uipanels to my tabs in the GUI opening function, copying the position of the first uipanel as position of the uitabgroup.
Afterwards I delete the uipanels.
That way I construct my tabs in guide. Quite simple actually. Only need to bring the correct uipanel forward in guide when I need to edit one.
Hello Yair,
I used your code to create Tabs and Childtabs. When I compared them to your IB-Matlab Gui i noticed that the Tabs look much better then the standard text fields?
Can you please give me a hint what I can do to get those betterlooking borders?
P.S. Saw you at Matlab Expo 2016 Munich. Your speech was really good and made me switch from unhandy creation of multiple figures to tabs.
@Stephan – thanks for the feedback about my Expo presentation, but I don’t understand your question: IB-Matlab is “just” a connector between InteractiveBrokers and Matlab – it does not contain any GUI. Perhaps you mean the Walk-Forward Analysis (WFA) tool that Alex Boykov presented in the article above? Please clarify your question, because it currently makes no sense.
@Yair I am talking about the GUI used in your tool (IB-Matlab: trade with InteractiveBrokers using Matlab). Sry i only used that missleading Abbreviation.
And Yes I use the tool mentioned above to build on.
My Question is: How can i get more realistic looking tabs. Similiar to your GUI?
@Stephan – again I reiterate: IB-Matlab does NOT contain any GUI. It is a pure Matlab function without any GUI. Perhaps you’re referring to some GUI program that is using IB-Matlab – IB-Matlab itself has no GUI.
Anyway, to get realistic-looking tabs you can use Matlab’s uitabgroup and uitab functions.
Hello,
I am trying to embed the tab code into my existing GUI. I am getting the error: Reference to non-existent field ‘SimpleOptimizedTab’. I analyzed your code and there is indeed to reference to the field. How come it only asks for the reference upon embedding in an existing GUI? and can this problem be fixed?
Thank you
Mosawi
Hello, Mosawi!
Thank you for your question! In the code from the article uses a figure named “SimpleOptimizedTab”, so you should change that name to your figure’s name. Also we can suggest you to take the SimpleTabPanel code and GUI and add there your code, than vice versa.
Thank you for your answer. I have now incorporated your ingenious tab code into my GUI. I would like to publish my software in the future, what is your policies regarding this.
Feel free to use it. It also be great if you will be able to notice somewhere that “GUI Tabs was built with help of WFAToolbox Team (http://wfatoolbox.com)”, but it is up to you.
Hello,
I am trying the code as provided, when i change the ‘SimpleOptimizedTab’ to my figure name, but it still shows reference to non-existent field ‘registration’. My figure name is ‘registration’. Can you help me figure out the problem?
Thank you.
Sean
Are you sure that your figure tag is “registration”? Please check it doing steps from this image: http://wfatoolbox.com/img/answer-check-figure-tag.png
Hello,
Thanks for sharing your tool. I’m trying to adopt your tab capability, but I decided to define a function (saved in a different .mat file, let’s call that function MyFunction.mat) that contains the following to make my program more modular but I’m getting an error that I’m not able to resolve. Below is what I included in this additional:
– The part of code in the opening function related to tab creation
– merge TabsFun into this function
As for the ClickOnTab function, I once left the ClickOnTab function (as it was) in the main GUI mat file and got the following error. I also tried to move ClickOnTab to my previously defined function (MyFunction.mat) and got the same error. Finally, I tried to define a separate .mat file for function ClickOnTab, but got the same error. All of these scenarios resulted in the following error. I’m not sure how to fix this problem.
Error:
Error using MyFunction
Too many input arguments.
Error while evaluating Axes ButtonDownFcn
Note that I don’t get this error when I run my original GUI. The error appears only when I click on one of the tabs.
Any help is appreciated. Thanks!
@Negs – first, I assume you mean MyFunction.m, not MyFunction.mat (MAT files contain data, not code). In answer to your question, I assume that you did not define MyFunction() as a function that receives 2 input arguments, as all UI callbacks functions must be defined (first input arg is the clicked object handle, the second input arg is an event data object/struct). Sommething like this:
Yair, Thanks for the reply. You are right, sorry I meant .m (and not .mat). No, Actually I passed the hObject and eventData correctly, but my problem was that I was using a slightly wrong syntax when setting the callback property of my object (object X). I could finally fix it by using the below syntax and now it works.
Thanks again for your time and the great tool!