I would like to welcome back guest blogger Robert Cumming, an independent UK contractor who developed a commercial class-based Matlab GUI framework. Today, Robert will highlight how he customized the use of uicontrol CData property.
Before detailing how I used this feature I will start with a basic example. A number of times (see example1, example2), users have asked is it possible to set the background of uicontrols to be transparent?
There are a number of reasons why we might want to do this. For example, we might wish to display a clickable image, and don’t want its background (which is typically white) to be displayed. To place on image on a uicontrol we use its CData property, which according to the official Matlab documentation must be a 3-D array of truecolor RGB values.
Let’s start with a simple example:
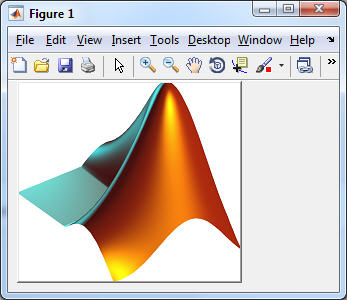
f = figure; img = imread('Matlab_Logo.png'); s = size(img); pb = uicontrol('Style','pushbutton', 'Position',[10 10 s(2) s(1)], 'CData',img, ... 'Callback',@(a,b)disp('push button'), 'BackgroundColor','green'); |
The code above produces the figure on the right; when we click on the image, the pushbutton callback is executed.
However the background of the button is white. This is because the image is MxNx3 rectangle the size of the button.
We can set the white portion of the image to be transparent so that it will show the background color of the pushbutton (in our example, ‘green’).
First, we read the image and convert it to a 2D double array that ranges from 0 to 1 (the original image was RGB uint8, 0 to 255). Then find the index for each RGB where the value is 1 (white):
img = imread('Matlab_Logo.png'); img = double(img)/255; index1 = img(:,:,1) == 1; index2 = img(:,:,2) == 1; index3 = img(:,:,3) == 1; |
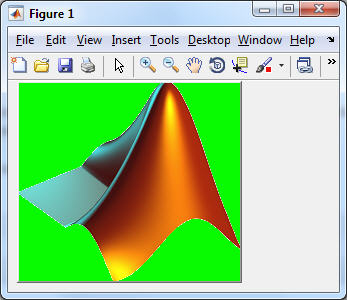
The color (in this example) that we want to make transparent is where all RGB is 1, so calculate a logical index where this is true and update the img variable:
indexWhite = index1+index2+index3==3; for idx = 1 : 3 rgb = img(:,:,idx); % extract part of the image rgb(indexWhite) = NaN; % set the white portion of the image to NaN img(:,:,idx) = rgb; % substitute the update values end set(pb, 'CData', img) % Update the CData variable |
Updating the CData we get the image with the green background. We could set the Color of the figure to be green, to match the uicontrol’s background color:
set(f, 'Color', get(pb,'BackgroundColor')) |
Transparent background
As mentioned here, we can link the CData to a screenshot image of the parent figure.
When we combine the two methods above, we get the effect of the uicontrol background being transparent (the smaller logo is a button that can be clicked):
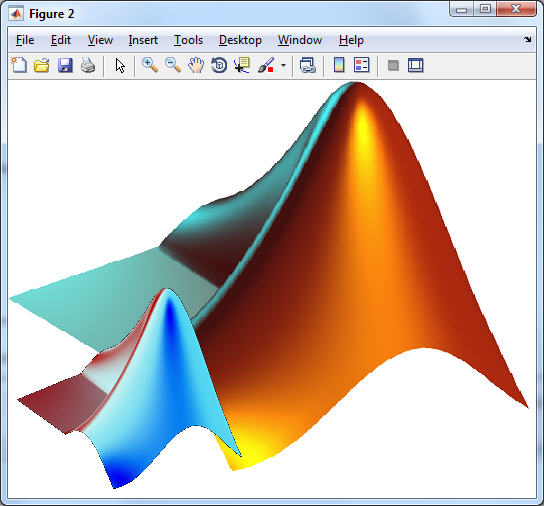
f = figure(); % create a figure with an axes on it ax = axes('Units','pixels', 'Position',[0 0 560 420], 'XTick',[], 'YTick',[], ... 'Nextplot','add', 'YDir','reverse'); % read the big logo image - background of the figure bigImage = imread('Matlab_LogoBig.png'); image(bigImage, 'parent', ax); % Display the image in the axes % read a smaller image - background of button img = imread('Matlab_Logo.png'); s = size(img); pos = [10 10 s(2) s(1)]; %Position of the button % Extract the portion of the image where the button will be. F = getframe(ax,pos); % take a screenshot of the parent figure pb = uicontrol('Style','pushbutton', 'Units','pixels', 'Position',pos, ... 'Callback',@(a,b)disp('push button')); % as before - calculate where the button image is white. img = double(img)/255; index1 = img(:,:,1) == 1; index2 = img(:,:,2) == 1; index3 = img(:,:,3) == 1; indexWhite = index1+index2+index3==3; % for each pixel, replace the white portion with the parent image data for idx = 1 : 3 rgb = 1-img(:,:,idx); % To make the picture quirky change the RGB pImage = double(F.cdata(:,:,idx))/255; % extract part of the image rgb(indexWhite) = pImage(indexWhite); % set the white portion of the image to the parent img(:,:,idx) = rgb; % substitute the update values end % Update the push button image set(pb, 'CData', img) |
Customizing checkboxes
I have shown how to manipulate the CData of a button. Unfortunately, not all uicontrols have a CData property — the documentation states that pushbuttons and toggle buttons are the only uicontrols that are fully supported. It also mentions that you can use it in radiobuttons and checkboxes, which brings me to how I used it in my application: I use this feature on a checkbox – to use it properly we need to ensure that the size of the image we put in CData is 16x16x3. In this case we set a transparent color by setting pixel RGB values to NaN:
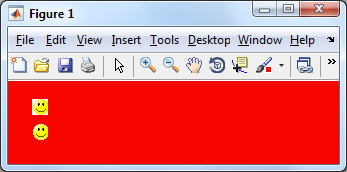
f = figure('Color','red'); smiley = imread('smiley.png'); smiley = double(smiley)/255; index1 = smiley(:,:,1) == 1; index2 = smiley(:,:,2) == 1; index3 = smiley(:,:,3) == 1; indexWhite = index1+index2+index3==3; % Create a first smiley which has the white background. uicontrol('Style','checkbox', 'Position',[25 50 16, 16], 'CData',smiley, ... 'Callback',@(a,b)disp('-1 smiley')); % For each pixel, replace the white portion with the parent image data for idx = 1 : 3 rgb = smiley(:,:,idx); % To make the picture quirky change the RGB rgb(indexWhite) = NaN; smiley(:,:,idx) = rgb; % substitute the update values. end % Create a second smiley which has the transparent background. uicontrol('Style','checkbox', 'Position',[25 25 16, 16], 'CData',smiley, ... 'Callback',@(a,b)disp('+1 smiley'), 'BackgroundColor','red'); |
The upper smiley is the original image; the lower smiley has its white pixels set to NaN, and the background colors of the control and the figure set to equal. The checkbox has no text is displayed, the user just clicks on the smiley to invoke the callback.
Note: This trick works in R2014b but I have deliberately used old style set and get commands for compatibility with older versions of Matlab. I have used this in all versions from R2008a onwards, and I suspect it probably works in older versions as well.
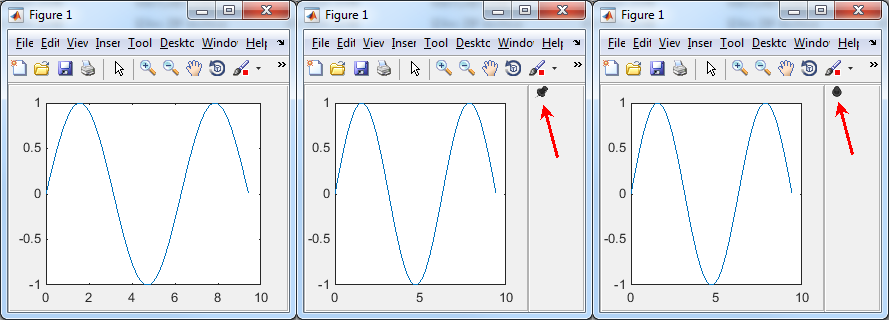
I used this feature several times in my Matlab GUI Toolbox. One of the uses was to create a pin for locking a dynamic panel in position: The panel is by default hidden; when the user hovers the mouse near the edge, the dynamic panel appears after some predefined time (2 seconds). A checkbox with a manipulated CData masquerades as a pin for locking the panel in position. When the panel is pinned, the CData changes accordingly:
transparent uicontrol usage example
Conclusions
1. The CData property of a uicontrol can be set to NaN to imitate transparent behavior.
2. By linking this with the parent CData we can super-impose an image on top of another image.
3. We can customize other uicontrols using the method to turn checkboxes (for example) into clickable images.
Have you used this feature? If so please share in a comment below.
Editor’s note: I have shown another alternative for displaying clickable transparent images in my article on displaying animated/transparent GIFs. Readers might also find interest in the related article on transparent uipanels. Next week I plan to show how MathWorkers Ben Tordoff and David Sampson coerced a simple checkbox uicontrol to have a radically different appearance, as flex-panel dividers in their GUI Layout Toolbox, similarly to what Robert explained today. Stay tuned! – Yair


It was a very well way to learn customize uicontrols.
But I have a doubt. Is posible that a “CDATA image” can be placed in a left or right position of uicontrol object, not in the center position of uicontrol ?
Thank you.
Att: A Engineer.
@Sergio – see http://undocumentedmatlab.com/blog/button-customization
More details can be found in Chapter 6 of my Matlab-Java programming book.
Hello Yair,

I have used your exact code found in section “Transparent Background”, but the generated figure does not render the same as your example. There are vertical striations in the transparent button image. (Please see screenshot).
I’m wondering if it is a software version issue. I’m running R2015b. Any ideas/solutions to repair this issue?
Thank you.
@Jeff – try changing your figure’s Renderer property value to
'OpenGL'– painters/zbuffer do not support transparency (details).Hello Yair! your codes are great!!! I used the transparent background one. It helped me a lot.
I would add as a NB that the position “pos” used by the getframe function is set in the coordinate system of the axes graph, meaning the position of the child image and the position used in the getframe function should be seperated. Otherwise the getframe function take the background from another part of the image.
I just have one question. When I superimpose the child image on the parent somewhere away from the edges I get a thin line colored by the ‘BackgroundColor’ on the left edge of the child image, meaning everything I want to be transparent is transparent except for that thin line. Do you have any idea what that could be due to? It seems to be something to do with the ‘Extent’ but I can’t figure it out..
Thanks